如題,一個不要把雞蛋放在籠子裡的幹念!會這樣說是因為自己曾經吃了悶虧,覺得「整個VPS一起備份」很方便,到頭來要回溯根本難將40G左右的檔案透過遠端連線還原。不如使用例行性工作排程 (cronjob) 定期備份吧!
20171019更新: 如果依照oodavid的shell檔,crontab 定期排程卻無法如期啟動,可參考 github 網友 andrewvttran 提供的方式,即直接指定 shell 檔案裡面第44行處的 s3cmd 指令路徑,將原本的:
s3cmd put "$tmpfile" "$object"
改為
/usr/local/bin/s3cmd --config=/home/ubuntu/.s3cfg put "$tmpfile" "$object"
其中
/usr/local/bin/s3cmd 是 s3cmd 所在位置
/home/ubuntu/.s3cfg 是 s3cmd 設置檔的位置
之前介紹過如何透過 s3fs 這個模組,透過掛載 Amazon S3 雲端空間的 bucket,作為 WordPress 媒體儲存媒介的教學。而除了 s3fs 外,亦有 s3cmd 這個模組可以透過「掛載」遠端映像檔方式,與 S3 進行連線,這次要介紹的工作排程,辨識使用 s3cmd 模組進行連接。
安裝 s3cmd 模組
轉貼網友 oodavid 的 snippet,首先得在您的 Linux 平台安裝 s3cmd 這個模組。此模組需要 python 2.6 版本以上(不支援python 3!)。
CentOS 使用以下指令:
cd /etc/yum.repos.d/
wget http://s3tools.org/repo/CentOS_5/s3tools.repo
yum install s3cmd
Ubuntu與Debian使用以下指令: (來源)
sudo apt-get -y install python-setuptools
wget http://netix.dl.sourceforge.net/project/s3tools/s3cmd/1.6.0/s3cmd-1.6.0.tar.gz
tar xvfz s3cmd-1.6.0.tar.gz
cd s3cmd-1.6.0
sudo python setup.py install
設定 s3cmd 模組
無論在何種版本的 Linux 系統安裝完 s3cmd 後,請輸入以下指令進入設定模式。
s3cmd --configure
輸入該指令後,s3cmd會跳出幾個問題要求您填寫,問題如下:

Enter new values or accept defaults in brackets with Enter.
Refer to user manual for detailed description of all options.

Access key and Secret key are your identifiers for Amazon S3.
Access Key:
Secret Key:
首先,s3cmd會要求您填入Amazon S3的金鑰(Access Key)與密鑰(Secret Key),這些資料可在您的 AWS Console 內的 IAM module 獲得,詳細教學請參考官方文獻。
Encryption password is used to protect your files from reading
by unauthorized persons while in transfer to S3
Encryption password:
再來會要求您輸入一組密碼(Encryption password),防止他人在檔案傳輸至 Amazon S3 的過程中讀取該檔案,請自行斟酌輸入高強度的密碼,可使用免費的線上密碼產生器。
Path to GPG program [/usr/bin/gpg]:
接著是要求您鍵入 GPG 程序的路徑,在 Linux 系統使用預設值(/usr/bin/gpg)即可,所以可以直接按 Enter 進行下一步。若您的系統尚未安裝 GPG 程序,可使用 yum install gpg (CentOS)或 apt-get install gpg (ubuntu或debian)。
When using secure HTTPS protocol all communication with Amazon S3
servers is protected from 3rd party eavesdropping. This method is
slower than plain HTTP and can't be used if you're behind a proxy
Use HTTPS protocol:
之後 s3cmd 模組會詢問您是否要使用 https 加密的方式進行檔案交換,在此按 Enter 以選取預設值(不以 https 傳輸)即可。
On some networks all internet access must go through a HTTP proxy.
Try setting it here if you can't connect to S3 directly
HTTP Proxy server name:
HTTP Proxy server port [0]:
然後,若您使用的主機不能直接與 Amazon S3 進行連線,可在此設定是否使用代理伺服器連入 S3。若代理伺服器的連接埠號與一般 http 通訊協定的 21 不同,記得要在 HTTP Proxy server port 設定該代理指定的埠號。
New settings:
  Access Key: ***********************
  Secret Key: ***************************
  Encryption password: ***********
  Path to GPG program: /usr/bin/gpg
  Use HTTPS protocol: False
  HTTP Proxy server name:
  HTTP Proxy server port: 0
設定到這邊後,s3cmd 會綜整您剛剛的設定,並詢問是否以上述設定與 Amazon S3 進行通聯測試,這邊請鍵入 y 後按 Enter,讓模組與 S3 進行對話!如果在 Please wait… 字串後看到 Success. Your access key and secret key work fine 🙂 與 Success. Encryption and decryption worked fine 🙂,表示 s3cmd 模組已順利連線到 S3,且您所設定的密碼(Encryption password)業已生效。
最後,再看到 Save settings? 字串時,鍵入 y 後按 Enter,儲存 s3cmd 模組的相關設定。
在伺服器端建立自動備份的 shell 檔案
請透過 vi 或 vim 指令,在您的伺服器建立一名為 s3mysqlbackup.sh 的檔案,路徑請自行斟酌,也請您修改 #Basic variables 下方 mysqlpass 與 bucket=”s3://bucketname” 二個欄位,輸入您的MySQL資料庫root權限的密碼,以及欲備份至 S3 的 bucket 名稱。建立完畢後可於該目錄下鍵入./s3mysqlbackup.sh指令,進行測試。
[wpgist id=”2206527″ file=”s3mysqlbackup.sh”]
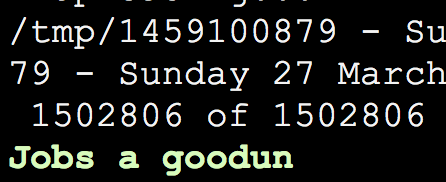
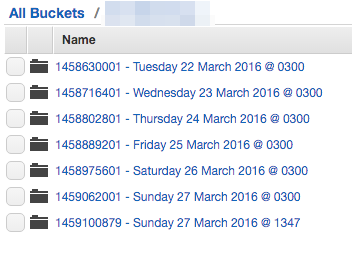
測試完畢後,若出現如圖所示的 Jobs a goodun 字樣,即代表備份成功(如下圖一),也可至您的 S3 檢視是否確實備份成功(如圖二)。
設定例行性排程工作(cronjob)
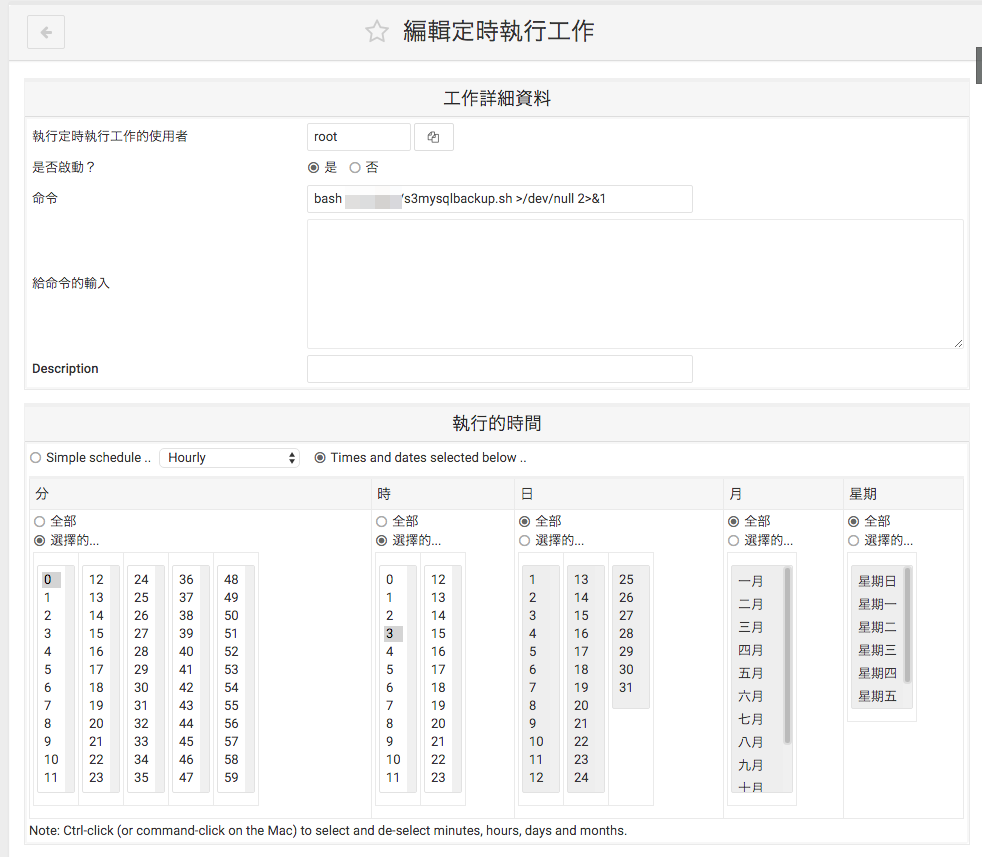
之後,請鍵入 crontab -e 指令進行自動排程設定,或參考 鳥哥 的教學,也可透過如 cPanel 或是 webmin 的後端管理程式進行設定。以指令方式設定如下:
0 3 * * * bash /路徑/s3mysqlbackup.sh >/dev/null 2>&1